- Open the [Color Adjust] tab from the [Quality] in the menu and adjust the entire ink density.
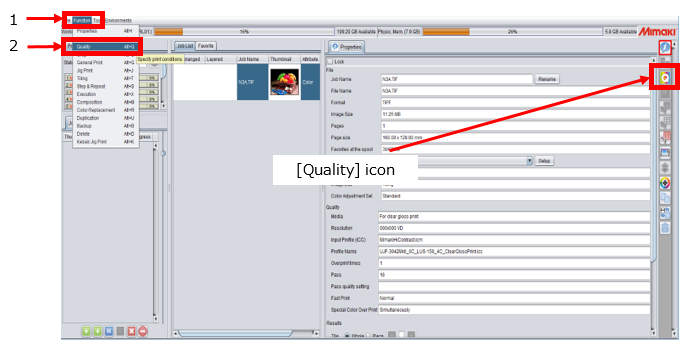
1. Select [Function] > [Quality] from the menu or click the [Quality] icon.
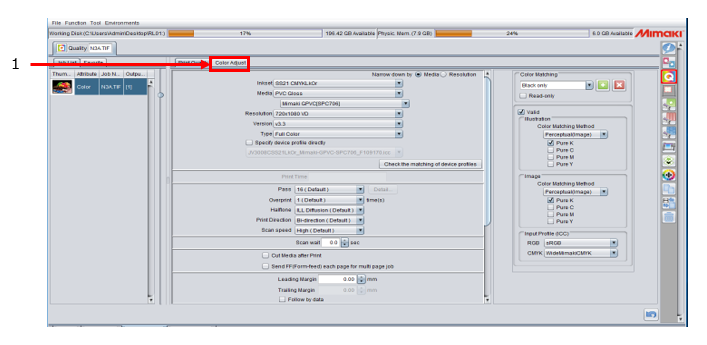
2. Click the [Color Adjust] tab.
3. Click the "Standard" in the [Color Adjustment Set].
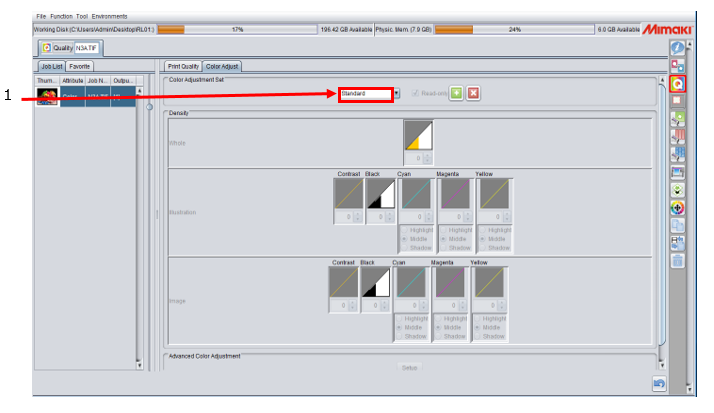
4. Enter the color adjustment set name and click the [+] icon.

In this example above, "Density Adjustment" is entered as a color adjustment set name.
5. Adjust the entire ink density.
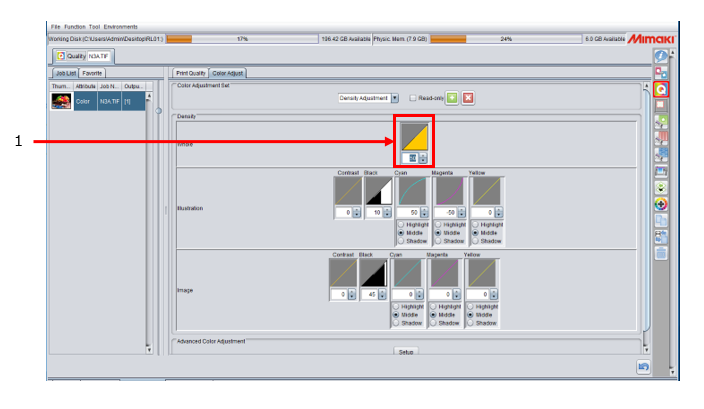
If you click the triangle button next to the text box, the value changes by 5.
Also, you can directly input the number between –50 and +50 into the text box.
By following the above procedure, you can print an entire image with the adjusted density.